
When we moved into our "new" house about two and half years ago, our girls planned to share a bedroom, so with Christian's room and the master, that left an "extra" bedroom upstairs. We debated turning the "extra bedroom" into an exercise room or an office. It briefly served as a playroom and a storage room, among other things. But when we found out we were expecting baby number four early this year, we knew for sure what that room would be - it would be a nursery.
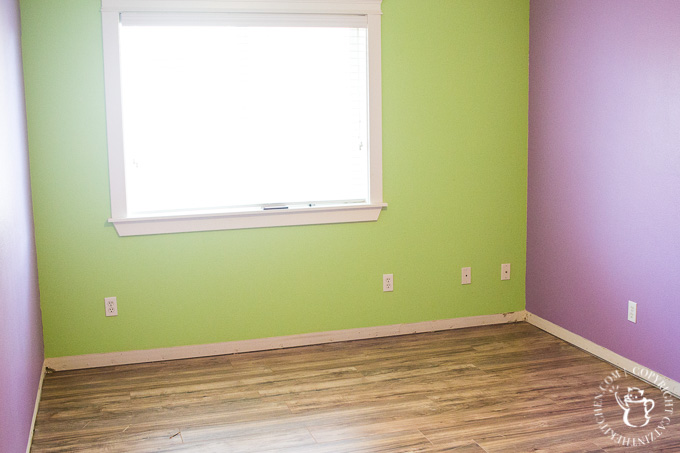
Based on the purple and green paint the room was sporting when we moved in, we're pretty sure it was a little girl's bedroom for the prior owners (maybe a little girl with Eden's color palate, because those are her favorite colors!). It was cute for a little girl, but the paint was in need of touchup, and the carpet was over ten years old - on top of being home to dogs with the previous owners, cats with us, and kids with both! It needed to go (as, eventually, will the rest of the upstairs carpet!).
We had never owned the house we were living in when any of our other children were born, so our nursery "makeovers" had always been limited to paint, and maybe curtains. Since we were free to do as we pleased with this one, we decided to makeover the entire room, from top to bottom. We'd still do it on a budget, doing everything ourselves, and we decided to use a neutral color palate, to give the room some flexibility in the future - we could add baby girl touches with furniture and decor!
So, if you're interested to get some tips and tricks from this DIY nursery makeover...read on!
Flooring

So, here's what the room looked like before we started on it. It wasn't a wreck or anything, but it definitely needed a lighter paint job and a replacement for the worn-out carpet. We did our downstairs in Traffic Master's Lakeshore Pecan laminate last winter, and not only is it inexpensive and beautiful, but it's held up wonderfully over the course of the nine months or so that we've had it in (the warranty is 15 years, so we expect that to continue!). We decided to use the same flooring in the nursery, or, as we now call it - Ruby's room. The total cost for the Lakeshore Pecan laminate and it's underlayment is just over $1 per square foot (what?!), so, believe it or not, replacing the entire floor in this room barely broke $150. That's hard to beat.

I carefully removed the existing base moulding so that I could touch it up and reuse it, which saves a bit of money as well. As you can see here, the laminate is "floating", meaning it just lays atop the underlayment, and is held in place by the base moulding. Tongue and groove - a few rows in, and you've got the process down! Also...closets are a pain.
With the flooring in, I left the baseboard off and moved on to the paint!
Walls
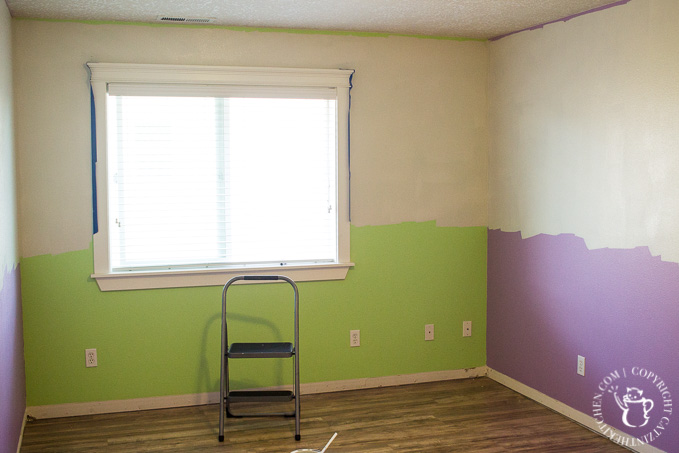
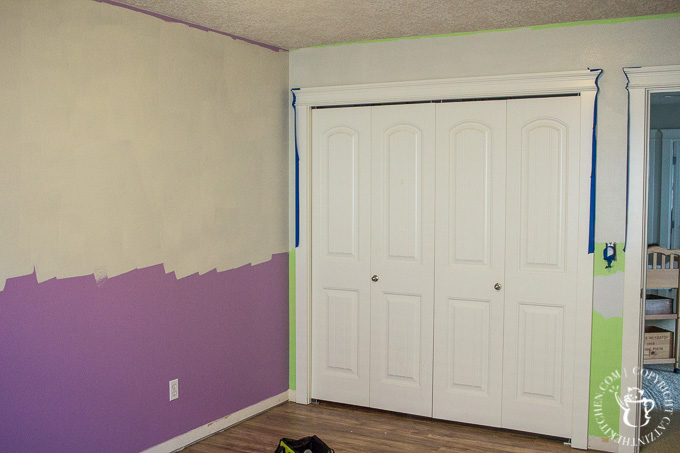
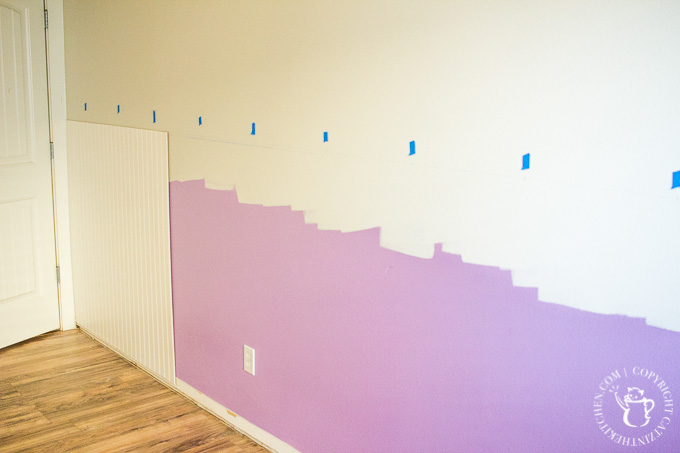
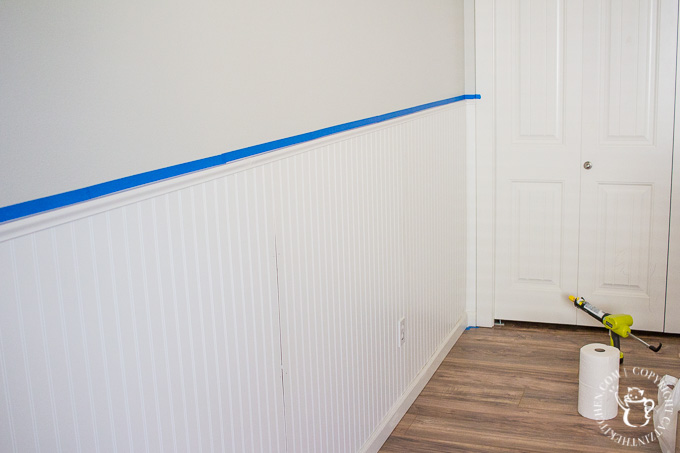
If you're looking at this paint job thinking, uh, Josh, you forgot a bit of the wall there...you would be correct. Chels and I decided to experiment with beadboard, and since the beadboard was four feet high, there was no need to paint the bottom half of the room (ceilings are eight feet high upstairs). Also, you'll notice that there's a small gap at the top. We were also planning to finish off the room with crown moulding, so no need to get all the way to the top either. All of this made my masking job incredibly easy!
Chels and I collected and tested about five different grays in the room. As I mentioned above, we wanted a neutral color, but one that was light, pleasant, and hopefully timeless. Most of the grays were either too dark or too blue in this room, but Behr Silver Drop ended up being exactly what we were looking for.
The beadboard was the big unknown for me here. I've never put it in before, and there are a ton of different options - installation methods, materials, finishes, kits, etc. Since this was intended to be a budget project, we went with a very inexpensive ¼-inch thick beadboard sold in four foot by eight foot sheets. The "bead" pattern runs the length of the eight foot sheet (basically designed to cover an entire wall), so when you cut it in half, you end up with two four foot square sections. This particular material is primed for painting, but we really liked the matte, slightly off-white finish, so we've decided to leave it as is for now.
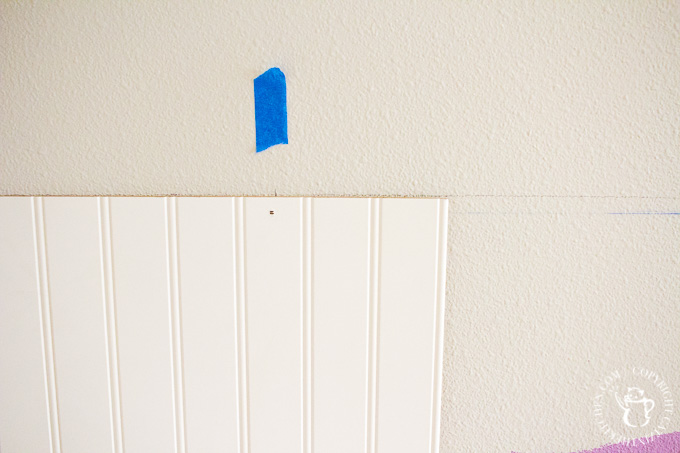
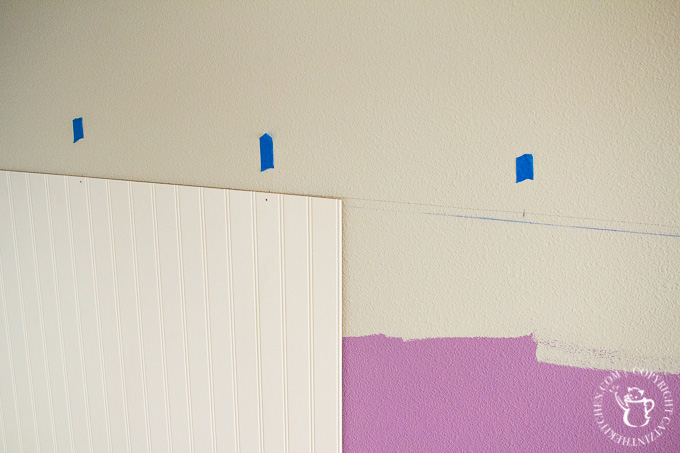
I used a laser level and a chalk line to draw a pencil line all the way around the room, in order to make sure my installation came out level, and then tacked up the beadboard panels with Liquid Nails and my cordless Ryobi brad nailer. Being the genius that I am, I marked the wall studs on the pencil line that I was covering up with the beadboard...meaning once the beadboard was up, I could no longer see where the studs were. Brilliant. To avoid marking up the freshly painted wall, my solution was the little pieces of blue painter's tape you see above and below. Lots of time wasted there! Using the nailer was a lot of fun, and it's inspired me to take on some more DIY projects - I've always wanted to try my hand at some woodworking projects.
I finished off the beadboard installation by replacing the salvaged base moulding and adding cap moulding to the top. When this was all up, the next step, naturally, was lots and lots of caulking. Each beadboard panel joint, every nail hole, everywhere the beadboard met the door or window moulding, as well as along the cap and base moulding - several tubes of caulking and lots of paper towels! My father-in-law did share the handy tip of using painter's tape to mask your caulking, which, while more work, does leave beautiful clean lines when removed.
Ceiling & Lighting
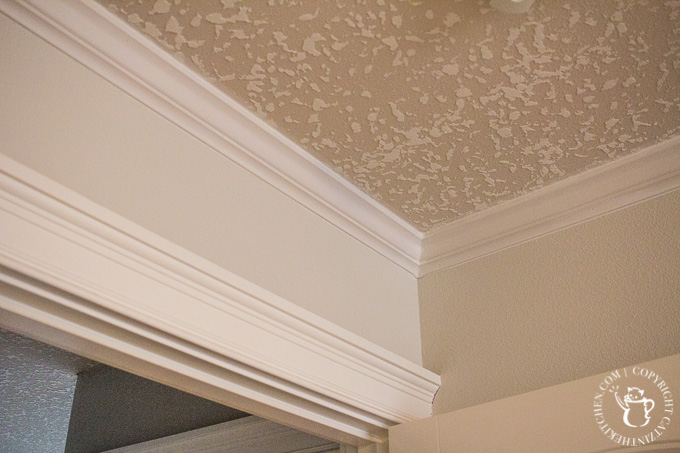 I mentioned earlier that we wanted to top out the walls with crown moulding, so that's what we did next. The only other time I had done crown moulding was when we updated our dining room (which you can see in this post about building a "farmhouse-style" formal dining table). There, I had used 12 foot pieces of moulding with "cheater" corner pieces that added some additional flair while also automatically handling the corner cuts and angling - pretty nifty. In the nursery, though, with the lower ceilings, I just wanted a basic, simple crown. I used pre-primed and painted crown moulding in eight foot long sections, and angled and cut them using Kreg's amazing Crown-Pro moulding tool. The corners are supposed to be the hardest part, but Kreg's tool makes that part easy - I had the most trouble with the butt joints - where the crown came together in the middle of the wall! Apparently scarf joints would have made my life easier - something to try next time.
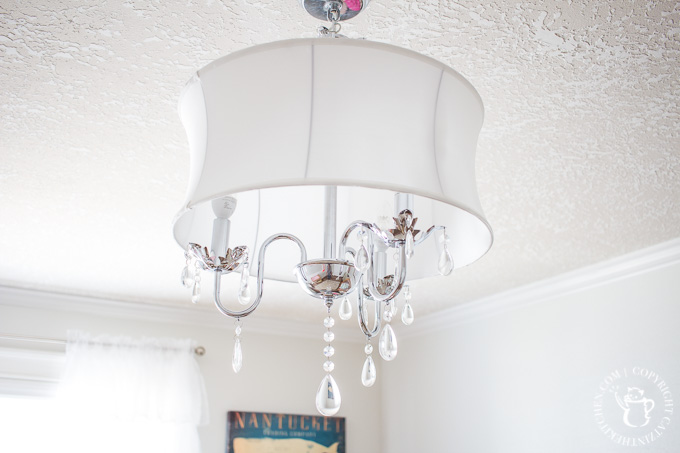
For lighting, we went with this extremely inexpensive but rather beautiful little chandelier. The instructions it came with were quite terrible, but I've installed my fair share of lighting fixtures, so I didn't have too much trouble. The end result was exactly what we wanted, and we installed Philips "warm glow" dimmable candelabra LED bulbs in it, which gives it a pretty, twinkly candle-like glow when turned down low.
Furnishings & Decorations
When it came to furnishing the baby's room, we had a few things we knew we were good to go with - our crib, changing table, and swing. The crib and changing table were both generous gifts from Chels' family when Gracie was born (almost 14 years ago!), and they have held up beautifully. The swing was new (a gift from grandparents) with Christian (almost five years ago!), and we love it - it swings in two different directions, makes relaxing white noise and nature sounds, has a (relatively) small footprint, and, wait for it...plugs into the wall! Hallelujah - no more "D" batteries! Maybe this is the norm now, but it was a total revelation when Christian was born. Beyond this, though, we weren't sure.
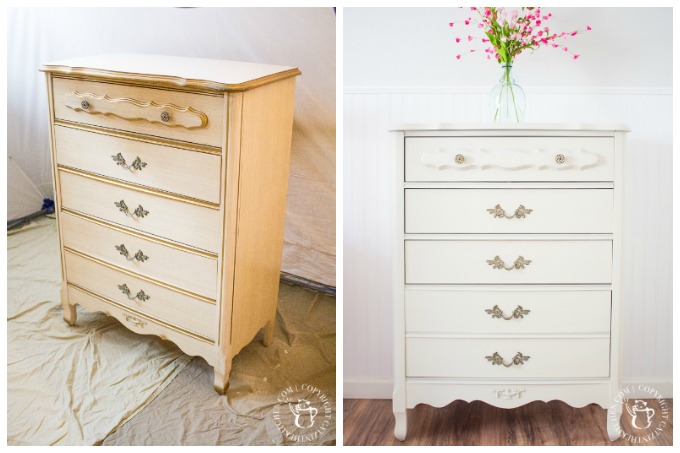
As it happened, we were driving home one day, and right around the corner from our house, some neighbors who were moving had set out on the curb a very cute set of two nightstands and two dressers, all matching, for $100. They were in great shape - just needed a new paint job. Initially, we thought we would probably change out the hardware as well, but once the new paint was on, the hardware matched perfectly - a very pleasant surprise!
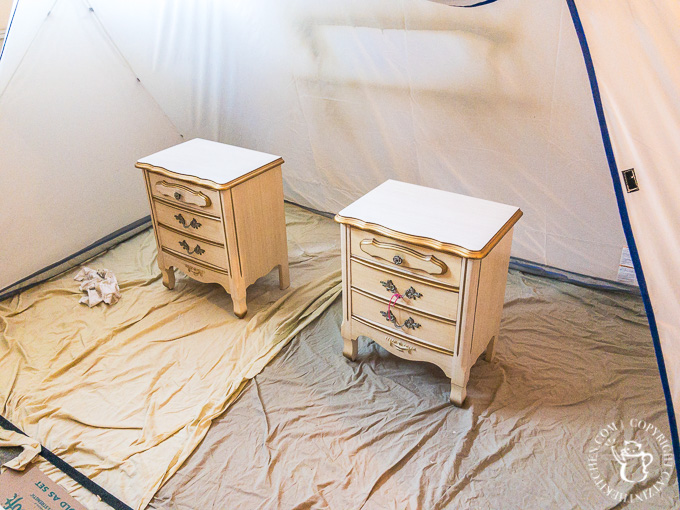
Now, unfortunately, I can't tell you what color of paint we used. It's not a secret - I just don't know! We went down to Home Depot one day to get some paint for the dressers, and happened to wander by the markdown paint (mis-mixed, etc). Right there in the middle, for $9, was exactly the shade we wanted. So, while I can't tell you what color it is, I can tell you this (which my dad has actually always told me) - always check the markdown paint first! This particular paint sells for nearly $40/gallon, so that worked out quite nicely. Properly thinned, it also went through our HomeRight Finish Sprayer beautifully as well, which eliminates brushstrokes. On furniture like this, the smooth spray finish imparts a very elegant look. Oh, and that tent that the furniture is sitting in? That's not an abused camping tent - it's actually a spray shelter HomeRight sells specifically for this purpose - being able to spray paint in your garage or on your driveway without covering everything else in paint (which I have done before...). Brilliant, actually.
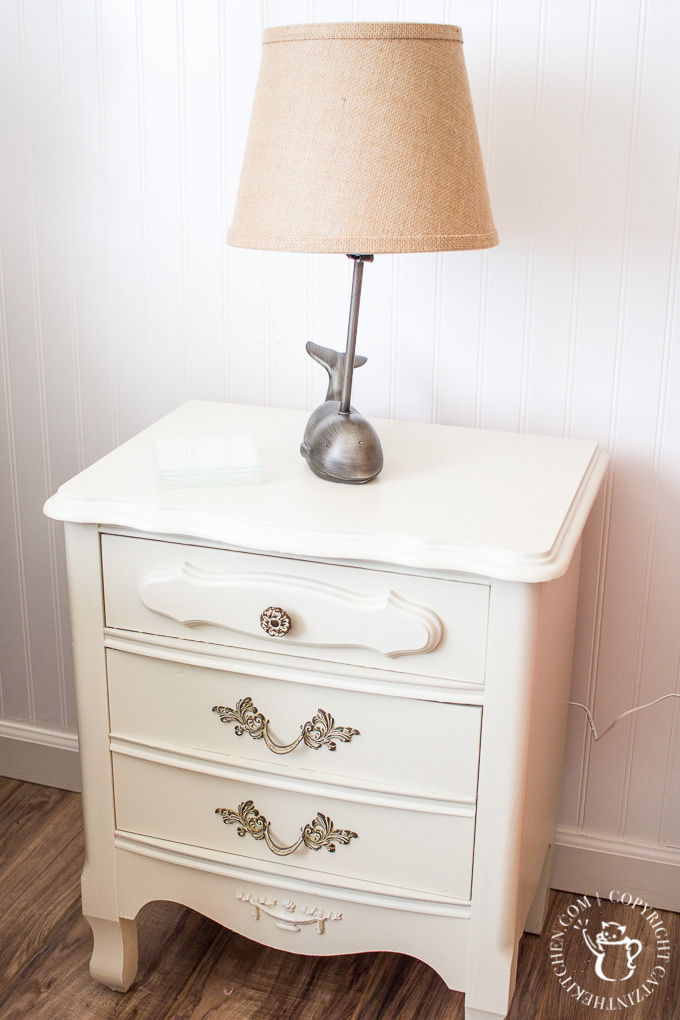
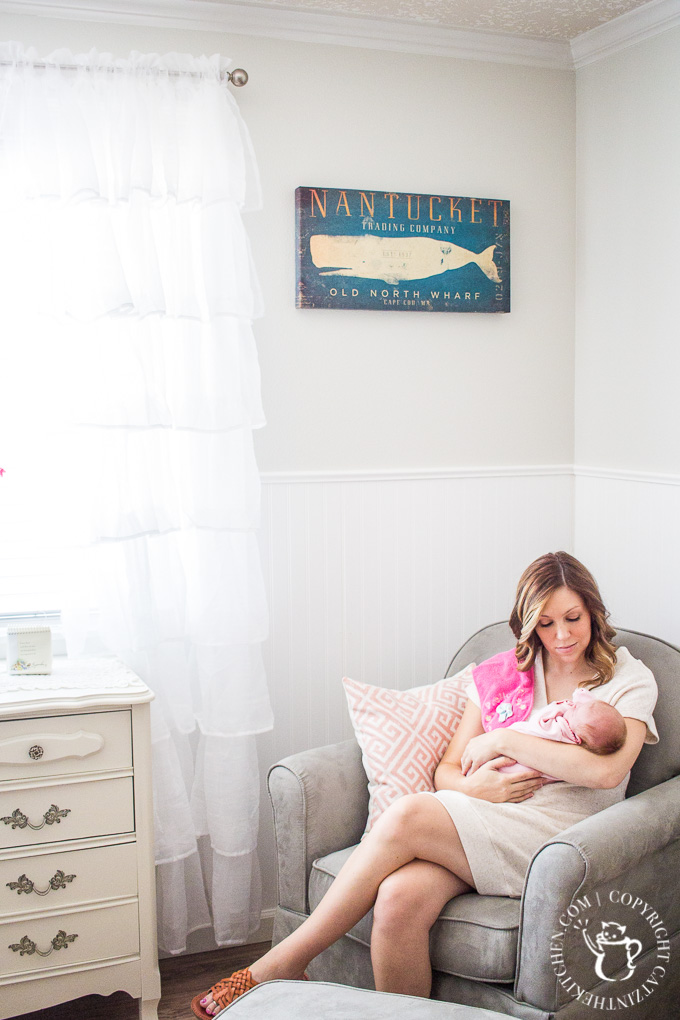
Chels decided on a few little "whale" touches in the room - not so much that it was whale-themed, but just so there were a few little things here and there (she loves whales...and cats). She found this cute little whale lamp at World Market, and although it is not quite as stable as you would normally expect a lamp to be, it's a great combination of cute and classy, and we love it.
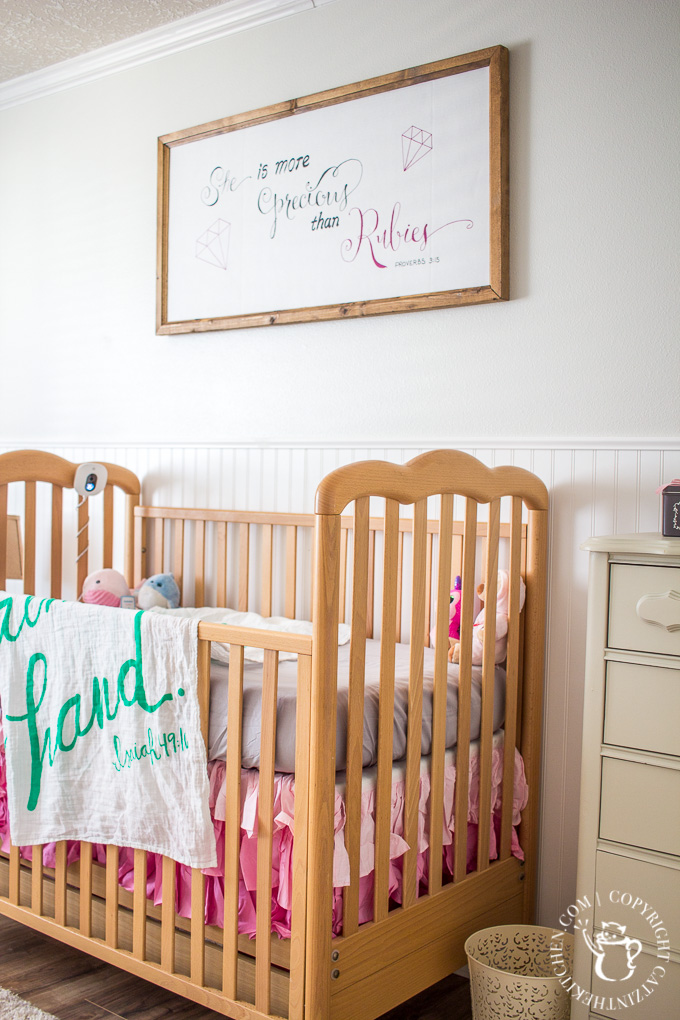
When we visited the Magnolia Market and Silos early in Chels' pregnancy, she knew she wanted to find this adorable baby blanket, and she searched and searched but couldn't locate it anywhere! Fortunately, the staff there is unbelievably helpful and friendly, and two or three Magnolia team members pitched in to help, eventually finding the last one in the store back in storage. It's incredibly soft, and we use it all the time! The sign above the bed is just something I made for Ruby with white cardboard and permanent markers, capturing a phrase from Proverbs 3:15. (Also, responsible dad side-note - I know the baby camera can't stay mounted on the crib. It's an easy spot to keep an eye on her when she's tiny and napping. Once she gets to be mobile at all - rolling over, for example - both camera and cord are being relocated to a wall mount well out of reach...)
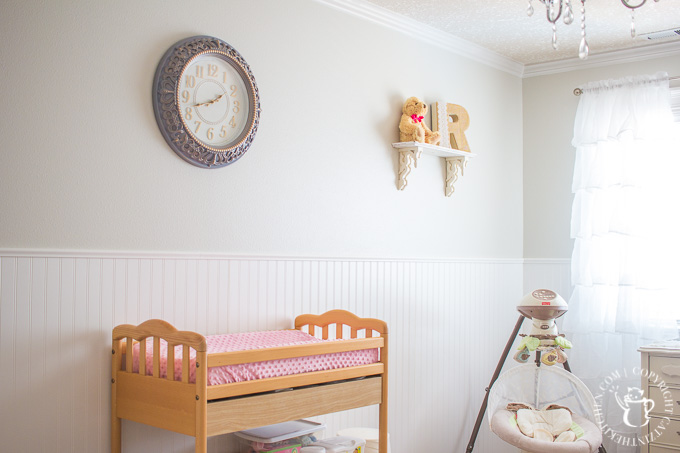
A few more miscellaneous things round out the furnishings. A very cheap ($10!) but beautiful wall clock, a shelf made from some old corbels Chels found at a bazaar and a piece of pine that I routed and distressed, and another pop of color from this fuzzy pink changing table pad cover. If changing table pad covers were a thing when Christian was a baby, we missed the boat - they are amazing! Baby doesn't get nearly as cold and angry when being changed, and you can just rip it off and throw it in the wash when the inevitable occurs. Much winning.
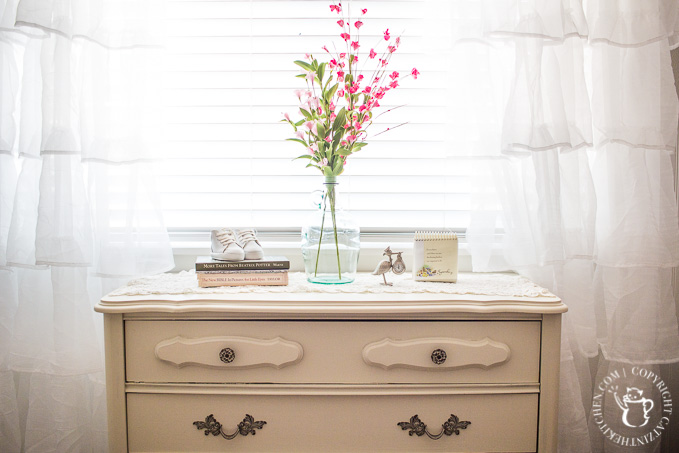
Chels decorated the top of the shorter refinished dresser with a cute stork clock her mom gave her when she was expecting Eden, a day by day calendar from my mom, little shoes, and some vintage children's books. She finished it off with more color from some lively pink silk flowers in a clear jar, which continues to add a sense of lightness to the room. The curtains help with that, too - we found these "gypsy ruffle" sheer panels on Amazon, and Chels is crazy about them.
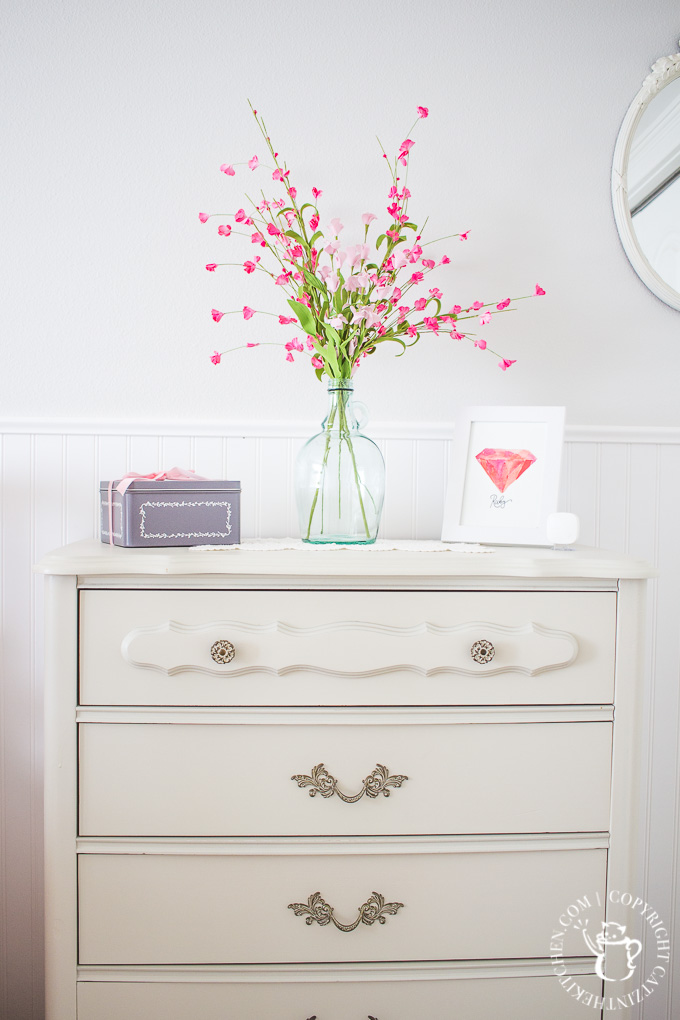
For the taller dresser, she put together another vase of silk flowers and a gray and pink gift box (which stores baby hair bows!). My incredibly creative sister Jewel (a little name kinship with Ruby there) painted a small watercolor ruby and framed it - an incredible surprise gift, and one of our favorite little pieces in the nursery now! I have no doubt that little Ruby will treasure it as she grows up.
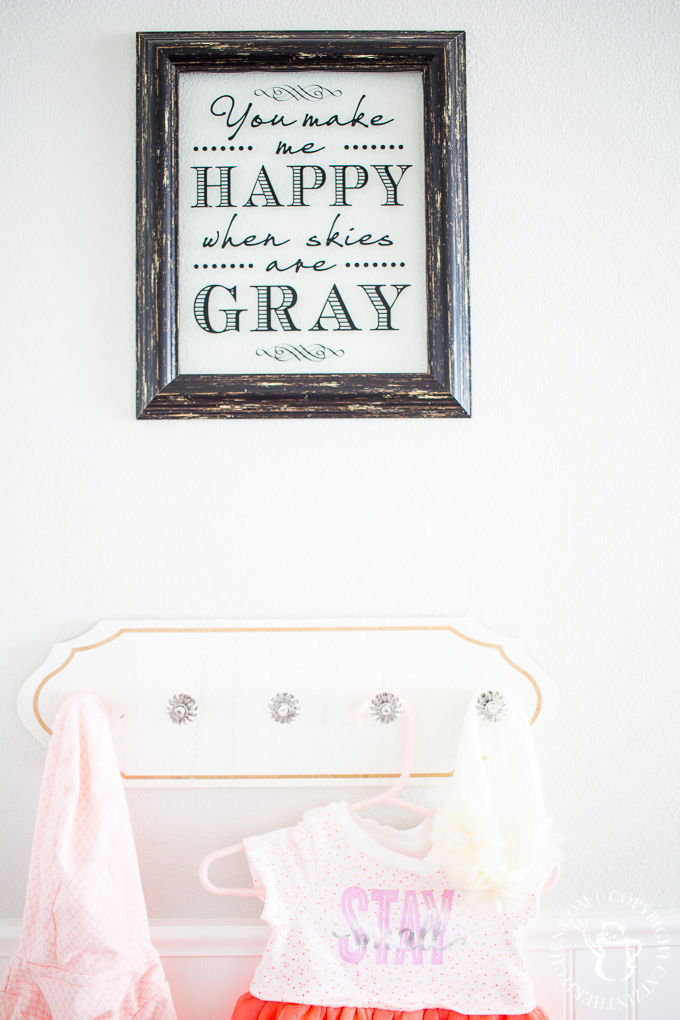
We didn't completely cover the walls - there is a fair amount of space left so that we can add more pictures and pieces as we find them. Chels did find a coat rack at Home Goods that fit beautifully, as well as this cute see-through "when skies are gray" sign, and we just had to use them in here. Also, this "stay small" outfit just kills me.
The last piece of furnishing that we were looking for was a glider. There are a million, of course, and many of them are quite spendy. We found ours on Amazon - we liked the color, the fact that it didn't look so much like a glider, though it glides very smoothly, that it came with a gliding footstool, and that it swiveled! The swiveling is so handy when you're trying to get up without tripping over the footstool and waking up the baby. At the time we bought it, it was about $200 with Prime shipping, which was an amazing deal. The price and eligibility for Prime seem to come and go, but it worked for us and we love it. A little higher back for some additional head support would be nice sometimes, but I think that's our only comment, really.
Cost & Wrap-Up
I mentioned early on that this was meant to be a "budget" DIY nursery makeover, so I'll field some cost estimates here (these are necessarily approximate, as I had some supplies already, and much of the paraphernalia like caulking and nails, etc, already in my possession from previous projects):
- Flooring - $150
- Paint - $40
- Beadboard and crown moulding - $200
- Lighting - $100
- Furnishings and decorations - $400
So, all told, I believe we were into this remodel / makeover project for less than $1000, including the furniture we purchased. Looking at just the actual remodel of the room, I believe we came in under $500, which, frankly, I think is incredibly cheap. A combination of doing everything ourselves, comparing prices across brick and mortar stores and Amazon, refinishing secondhand items, and, of course, saving things we used with our older kids, really helped keep the cost down, while still allowing us to indulge in what felt like a real baby room remodel.
For us, this DIY nursery makeover was a deeply rewarding experience for a few reasons - one was the teamwork. Chels and I worked on this together. Two, the project felt like a physical way to express how excited we were to welcome Ruby into our family, and I think our older kids really picked up on that, pitching in where they could and getting excited themselves. Lastly, and most importantly, Ruby's room has become a relaxing, quiet place to bond with her and spend time with her (well, until diaper-changing time comes - no quiet then!). I can see Chels relax more just by being there, and that definitely makes it well worth the effort! If you're working on a nursery remodel of your own, hopefully you'll find a little inspiration in our experience!


Leave a Reply