Believe it or not, we’re closing in on the beginning of grilling season. Yes, at least here in the evergreen north Willamette Valley, spring seems to be setting in a bit early this year. No, we’re not breaking out shorts and shades (that comes in about August), but the constant drizzle is giving way to persistent showers, and the ever-temperate level of mercury in the thermometer is rising ever so slightly, from its normal low 30’s into the mid 40’s. Thus, I declare grilling season (the only season that truly matters) to be right around the proverbial corner.
In celebration of its advent, I’m planning a few posts on the basics of grilling. Let’s be clear: there are a wide variety of grilling basics I have yet to master, or even attempt! However, I have a few things I’m pretty comfortable with, and I like to think I generally know my way around a grill (or at least know what I’m not good enough to mess with), so I’ll share some tidbits as they return to me after the long winter hibernation.
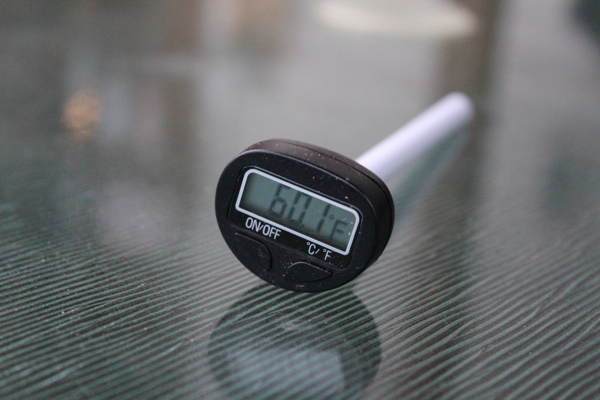
Believe it or not, last year was the first year I purchased a “real” grilling meat thermometer. I had a simple beef thermometer that I used during my massive burger phase, but I never took the time to purchase a decent, digital meat temperature taker! After visiting my grandpa in Southern California last May and using his to grill a lime-chicken-cilantro-quinoa-avocado feast for thirteen people, I knew I had to have my own. Luckily, it’s one of the least expensive purchases you’ll ever make for your grilling ensemble – a nice one is about $15-20, while inexpensive ones (which will work just fine) go for about $6-10 at places like Harbor Freight Tools.
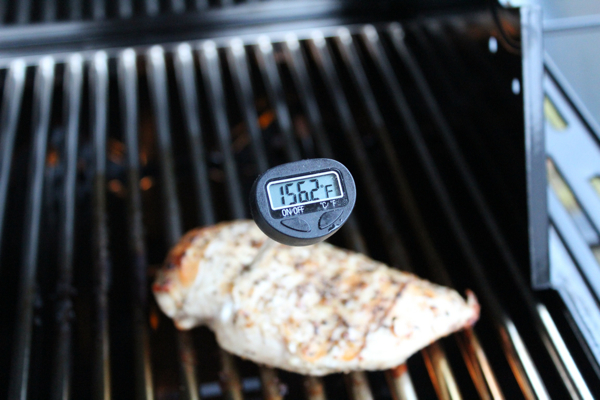
Using a meat thermometer couldn’t get a lot easier. Figure out what temperature you’re supposed to get the interior of the meat to, grill for a while, and then stick the thermometer in and see how close you are (you don’t want to puncture meats like steak and chicken too often, or they’ll start to lose their juiciness, so follow the recommended timeframes before you check). Here’s what you’re shooting for (at a minimum), according to the FDA:
- Beef, veal, lamb, & steak (pork is the same, with a 3 min rest time): 145° F (63° C)
- Ground meats, including the above and pork, but not poultry (see below): 160° F (71° C)
- Poultry, including ground: 165° F (74° C)